
iOS 11 is a funny release from Apple; one where they both implement the most basic, forehead slapping, obvious missing features, to some of the most impressive new technologies available. In most years I imagine Apple would be patting itself on the back for re-inventing the idea of ‘files’, after explicitly removing them for iOS from it’s inception. This year, however, they didn’t need to do marketing backflips to promote tech that’s as old as the computer itself, they had a couple more tricks up their sleeve.
Core ML
Core ML is a framework for integrating trained machine learning models into your app. The interesting differentiator from other similar offerings is that the model, and all predictions from the model all live on the device itself, without needing to hit an API. This is especially promising for us at Tome since we have a couple of projects in the works that must work in distant RF starved wilderness areas. So functionality that relies on the network isn’t really an option for us.
Core ML is not a full machine learning solution. It has the requirement that you already have a trained model, and that you can convert that model into an mlmodel file.
Getting models
Apple was kind enough to provide us with a few pre trained models already in the .mlmodel format here. You can also find many pre-trained open sourced models, however you’ll need to convert them to the .mlmodel format yourself.
Open source, pre-trained models – Model Zoo · BVLC/caffe Wiki · GitHub
Again, luckily for us, Apple has created a Python library that can do just that for a number of different popular machine learning model formats.
Converting a model – Converting Trained Models to Core ML | Apple Developer Documentation
See the coremltools documentation – coremltools — coremltools 0.4.0 documentation
Using models
OK. The hard part is over. Using a model is a simple matter of dropping the .mlmodel file into your project, and using the generated swift source code the file gives you!
file
Here, I’ve used the GoogLeNetPlaces mlmodel for scene detection.
If you click the ‘model class’ callout you can see the code that has been generated for you.
@objc class GoogLeNetPlaces:NSObject {
    var model: MLModel ...
You can also see the inputs this model requires, and the outputs it will provide. In our case, it wants an Image<RGB, 244, 244> . Hrm… that’s annoying, we have to go through the rigamarole of resizing an image with CoreImage? NOPE! Apple has again, thought of that, and has included some helper methods in the Vision framework for creating CoreML requests with images. The following code is probably generic enough to work for your specific CoreML image classification requests.
import CoreML
import Vision

func imageObservation(image: UIImage,
                    mlModel: MLModel,
                   callback:@escaping ([VNClassificationObservation])->Void) {

  guard let model = try? VNCoreMLModel(for: mlModel) else {
    fatalError("There's something wrong with your model");
  }

  // Create a Vision request with completion handler
  let request = VNCoreMLRequest(model: model) {
    request, error in
    guard let results = request.results as? [VNClassificationObservation] else {
      fatalError("unexpected result type")
    }

    callback(results)

    DispatchQueue.main.async {
      callback(results)
    }
  }

  let handler = VNImageRequestHandler(ciImage: CIImage(image: image)!)

  DispatchQueue.global(qos: .userInteractive).async {
    do {
      try handler.perform([request])
    } catch {
      print(error)
    }
  }
}
Once we get our VNClassificationObservation back from the request, we just parse it out and get the image classification data!
let observationComplete : ([VNClassificationObservation]) -> Void = {
  observations in

  guard let topResult = observations.first else {
    fatalError("unexpected result type from VNCoreMLRequest")
  }


  self.textLabel.text = "\(topResult.identifier) : confidence - \(topResult.confidence)"
}

imageObservation(image: image, mlModel: GoogLeNetPlaces().model, callback: observationComplete)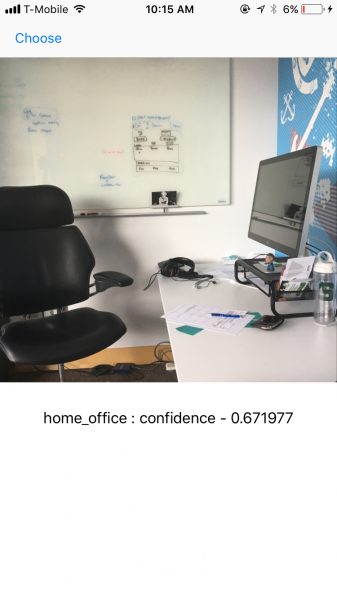
This isn’t a home-office, it’s just a regular office, but damn that’s pretty good!
ARKit
The best technology is always a ripoff of the best science fiction. Cell phones, autonomous vehicles, 3d printers, and drones all had their analogs in sci-fi before being real tech. Augmented reality is no exception… with one small caveat. The sci-fi that introduced me to the concept of AR was not the best sci-fi, but horribly enjoyable schlock.
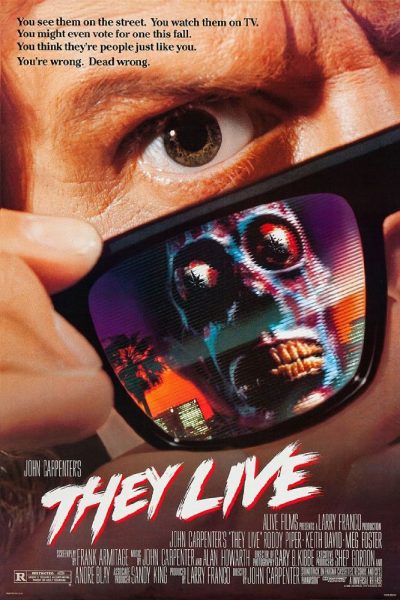
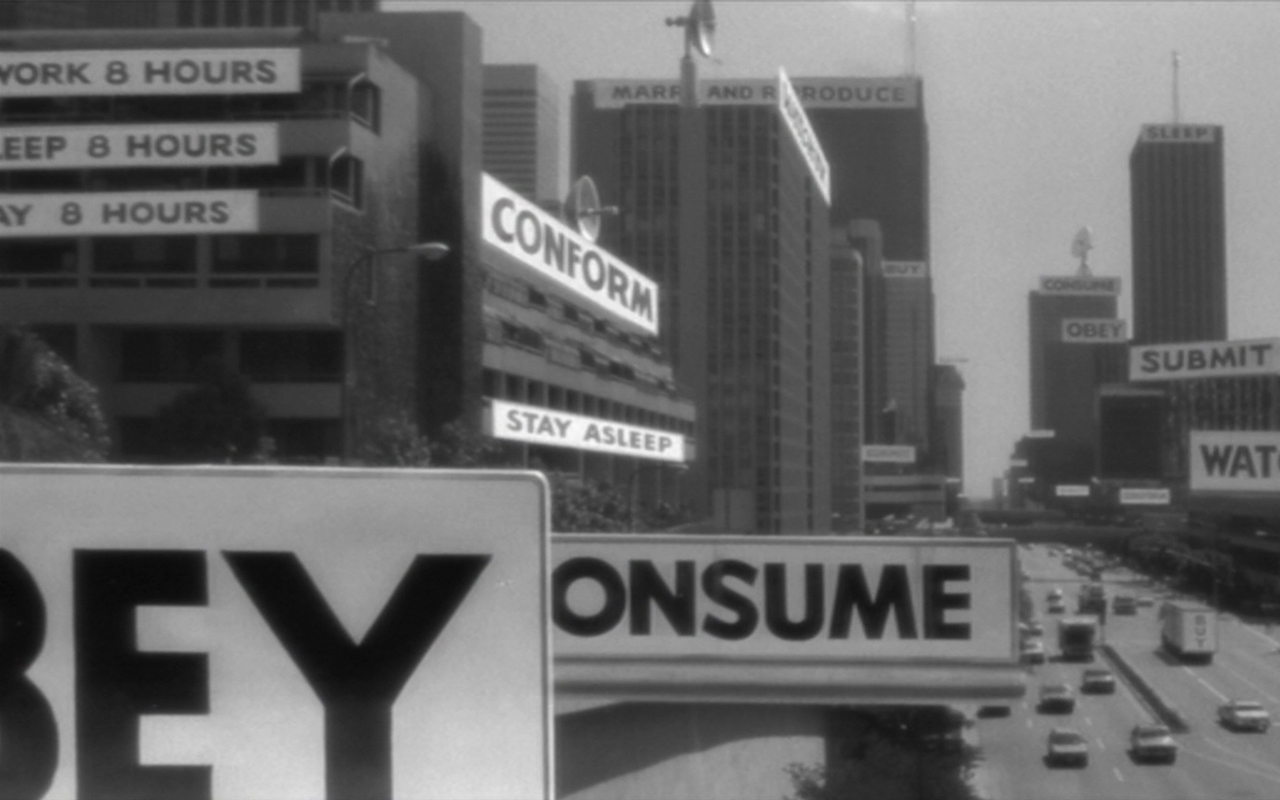
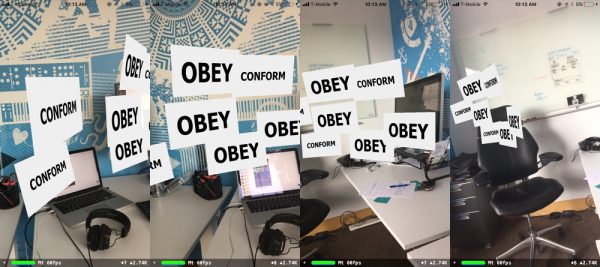
They Live is the story of a drifter (Rowdy Roddy Piper of 80’s WWF fame) who discovers a pair of sunglasses that allows him to see the world as it really is: A prison for mankind created by evil invaders from outer space!
When George Nada (Piper’s character) puts on the glasses, he sees a horrific landscape of subliminal messages, and skull faced aliens living alongside our own imaginary reality. The first thing that popped into my mind when Apple debuted ARKit at WWDC was “OMG I want to make a They Live app!”… because all my ideas are terrible!

ARKit can detect surfaces, and project 3d models onto those surfaces. It can keep them stationary relative to real life anchor points as the camera moves around. Surely it could project a simple texture and plane on top of another plane you detect! Should be easy peezy!
So I started digging around in the API to find out how to detect billboards, and project subliminal messages on them.
To my shock and horror, however…

The only plane detection we can accomplish so far is horizontal! There is an enum for what type of plane detection you want to accomplish, so ostensibly a future release of iOS could support this (and it likely will). In the mean time, I could project my mind control messages onto tabletops, but that just doesn’t seem cool to me. So I tried a couple other experiments.
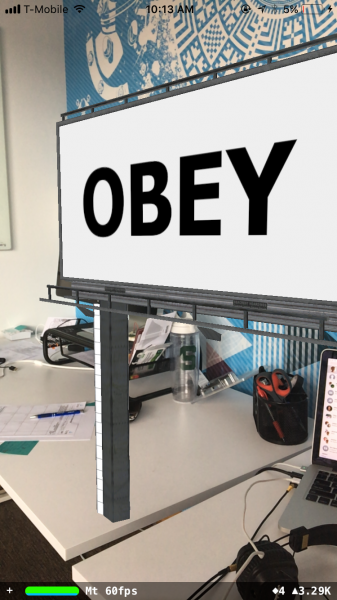
First just projecting my own billboard model onto a horizontal plane. Here we have a billboard model (imported via scene kit) sitting on my desk. I shrunk it down so it would fit in the room.
I also made some free-floating signs that just hang in the air in front of your face.
Adding these signs to the scene was fairly simple. They showed something similar to this in the ARKit WWDC demo.
Introducing ARKit: Augmented Reality for iOS – WWDC 2017 – Videos – Apple Developer
//Create our plane, and add an image as the texture...
let imagePlane = SCNPlane(width: sceneView.bounds.width/6000, height: sceneView.bounds.height/6000)
imagePlane.firstMaterial?.diffuse.contents = UIImage(named: imageName)
let planeNode = SCNNode(geometry: imagePlane)

//Add the plane to our scene
sceneView.scene.rootNode.addChildNode(planeNode)

//Place the plane in front of the camera
var translation2 = matrix_identity_float4x4
translation2.columns.3.z = -0.3
planeNode.simdTransform = matrix_multiply(currentFrame.camera.transform, translation2)
When I take a second crack at this though, I will probably forego using ARKit, and use the Vision framework, MLKit, and the Inception V3 model to detect billboards in real time . Then detect the rectangles on them in order to project my billboards instead.
I can even start working on my Alien detector with the Vision framework face detection!
VNDetectFaceLandmarksRequest – Vision | Apple Developer Documentation

What does this mean?
Apple has democratized some of the technology that is at the forefront of what computing is doing today. Between placing virtual objects in a real setting, and making ML easy to learn and use, these technologies are not just for researchers or large teams anymore. They are truly applicable to consumer focused and independent developers. You can focus your time and effort on designing an awesome product rather than researching the forefront of computer science.