

Diabetes is annoying and according to the Juvenile Diabetes Research Foundation, type 1 diabetes (T1D) affects 1.6 millions Americans, with roughly 64,000 new cases each year. T1D is an autoimmune disease in which the pancreatic beta cells are attacked by the body’s immune system, resulting in the need for insulin – the hormone that regulates the body’s glucose level. Too much glucose for too long will result in irreversible tissue and nerve damage, so proper control is essential to reduce complications..
Carbohydrates are broken down into glucose and for us lucky 1.6 million with T1D, counting carbs is a very useful – if not mandatory – tool to have in our bag of tricks for managing diabetes. Another valuable tool is an insulin pump. There are several manufacturers with different models, however, there is a common feature they have: carb input.
You see, diabetics need to determine how much a single unit of insulin drops our sugar (correction factor). We also need to know how many grams of carbohydrates a single unit of insulin will cover (carb ratio) – that’s the important one. Nutrition labels are essential, too, because how else would I know that 8 Nilla Wafers have 21 grams of carbs? If my carb ratio is 1unit of insulin to 10 grams of carbs, I’ll need to bolus 2.1 units of insulin.
What about when I want to fill my favorite bowl with vanilla yum-yums and not count them one by one? Well, that’s where it starts to become difficult – unless you have a kitchen scale. Sure, we could weigh it out on a simple kitchen scale, bust out a calculator and figure it all out or make a good guestimate.
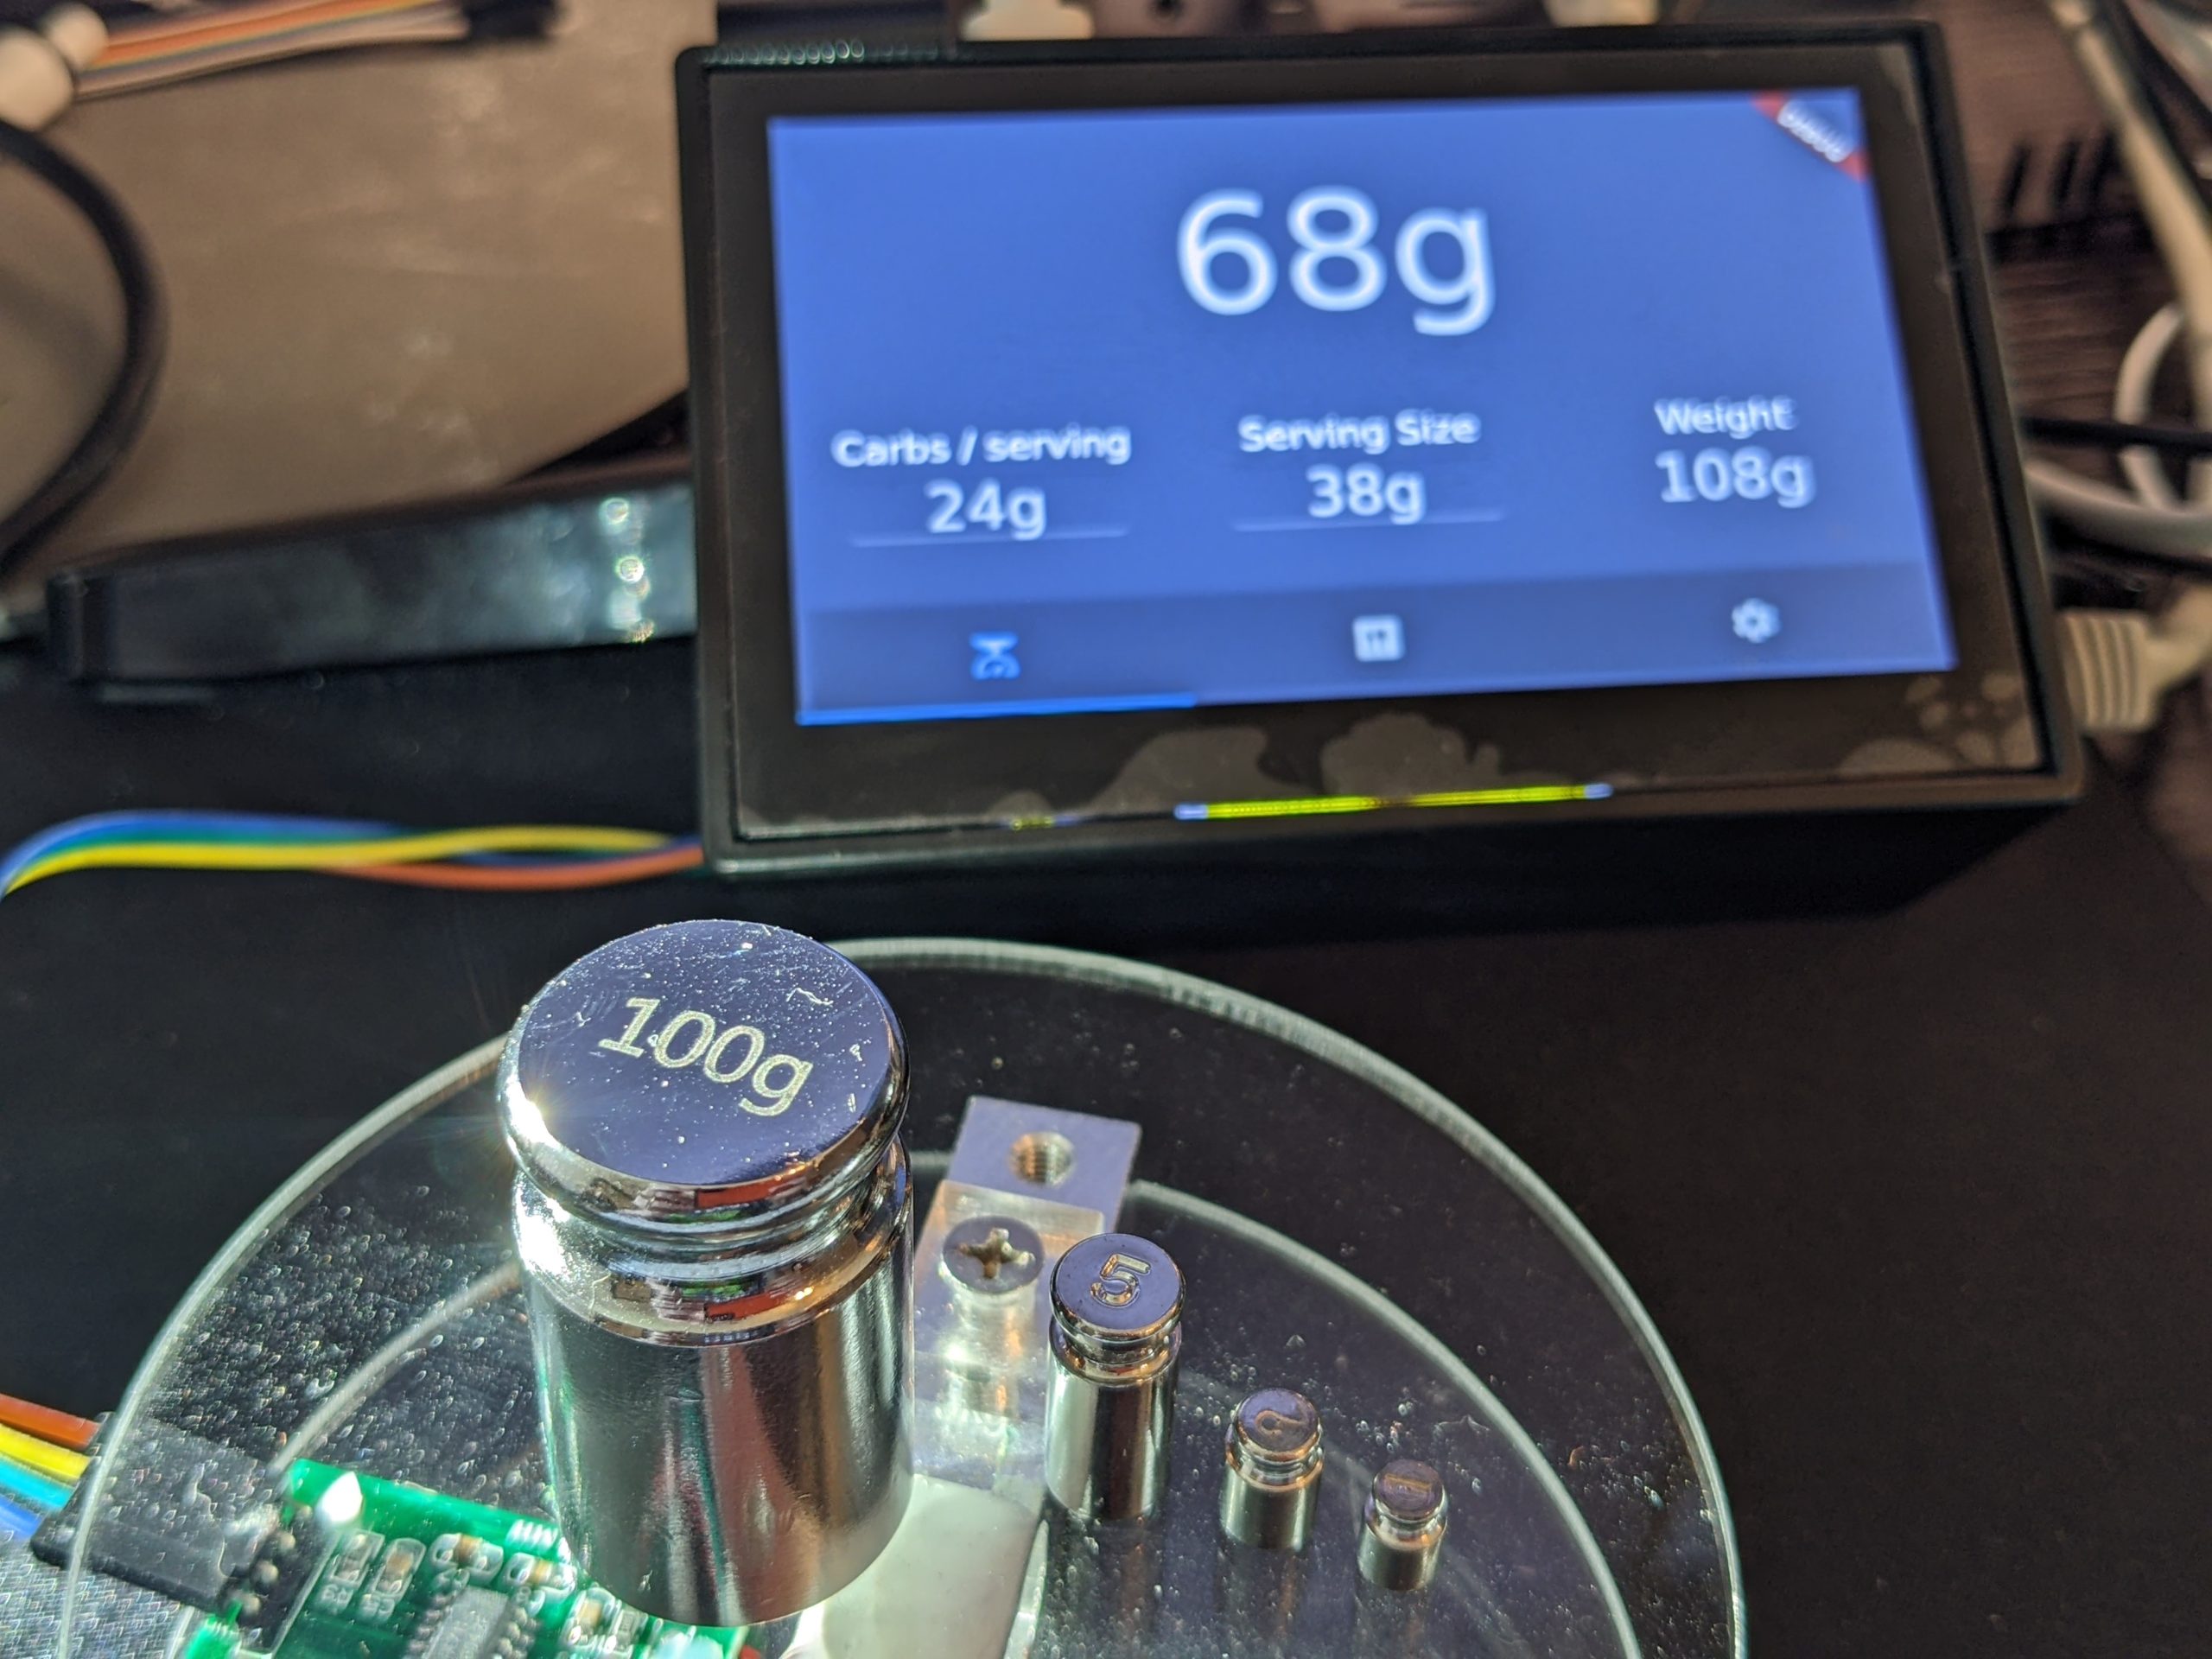
That brings us to the beginning of my Sugar Glider project – a food scale with a touch screen (currently 4.3”). Excessive? Probably. Useful? I think so. The project consists of the following hardware:
- MakerHawk Load Cell Sensor (HX711) – https://www.amazon.com/dp/B07GQPV6C4
- Raspberry Pi 4
- Waveshare 4.3” DSI display – https://www.amazon.com/dp/B08LH5MFVS
- Calibration weights – https://www.amazon.com/dp/B08SQ2WTNY
I had originally specified a SPI driven 3.5” touchscreen. However, the first two options were available: use X11 and a desktop environment or a fork of fbcp to drive the SPI display with buttery-smooth rendering. The only problem with the latter was touch was sacrificed for performance, and I didn’t need something as large as X11 since my goal is to reduce this project down to a yet to be determined smaller board.
It was an easy hookup since I went with a DSI display (a ribbon cable connected to the Raspberry Pi instead of using an HDMI output), and an already assembled HX711, load cell, and acrylic platform. Because of this, the actual wiring was straight forward..

On the software side I used
- latest 32-bit Raspberry Pi OS Lite Bullseye
- Flutter for the UI
- flutter-pi for C++ for the HX711 reading
- gRPC for remote procedure communication
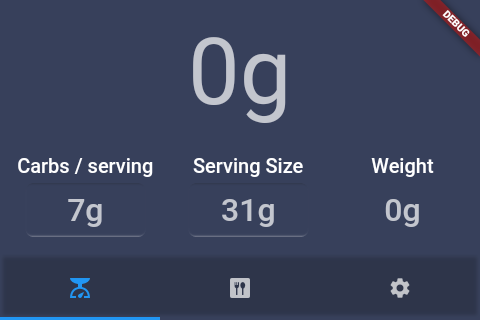
Because Flutter allows for hot reloading and multi-platform deployment, development of the overall look and feel of the application was simple. The first iteration of the interface includes three tabs which can be navigated to by pressing their icons, or by swiping left and right, giving it a familiar mobile app feel. The main screen has the overall carbs counted based on the carbs per serving, serving size, and total weight.
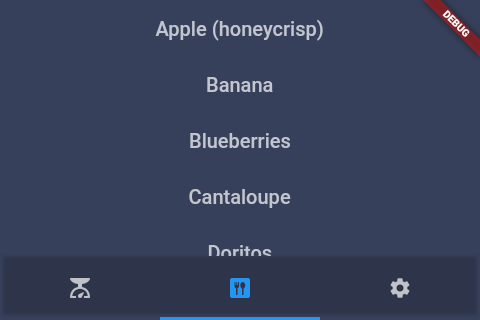
The second screen is a scrollable list of user entered “presets” and general foods, such as apples, bananas, and blueberries. Users would be able to add in their favorite foods such as Doritos, Fruity Pebbles, or anything else that has nutritional information available. The USDA provides food nutrition information for vegetables, fruits, and other whole foods and will likely be used.
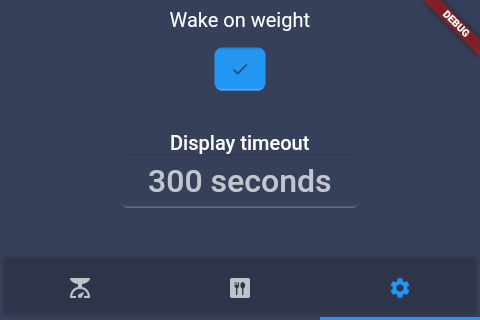
An application isn’t complete without some way to customize it. The two most obvious options to me were one for a display timeout and another to turn it on. While the screen will awaken with touch, an option to wake it by placing weight on the scale is provided. Additionally, the user can change how long the screen will remain on after the last interaction, defaulting to 5 minutes.
In my ideal world only one step would be required for most things and this is no exception. There are several open source projects that I plan to look into to be used and really make this scale shine. Ideas include adding a camera to the mix to read nutrition labels, making it larger with the dual purpose cutting board/scale, or simply design and 3D print a case to enclose everything.. Under the hood could use some cleaning up, too. After smoothing out the initial rough edges and having a performant application, I’d like to look into swapping Raspberry Pi OS for Yocto, and alternatives for flutter-pi to increase performance.
Some things to explore:
- Open source API to nutrition database
- Camera to parse nutrition labels
- https://github.com/openfoodfacts/off-nutrition-table-extractor
- Read barcode to look up data from an open source nutritional database
- Design & 3D print case for Raspberry Pi and scale
- Use Yocto instead of Raspbian OS & flutter-pi